

Marc Adler
CTO as a Service
In the previous article of the series, we created a Quote Alerter for Slack and AWS. The Quote Alerter will notify a user on Slack if the price of a stock went above or below a certain target price. The Golang-based code runs on AWS and uses a Postgres database on RDS in order to store all of the alert subscriptions and the list of current stock prices.
In this article, we will migrate the quote-checking logic to an AWS Lambda function.
(There is an article on the CTO as a Service blog that discusses using Lambda with Visual Studio Code and C#/.NET. That article has some good intro material on Lambda functions on AWS, so you are encouraged to glance over it if you have any basic questions about Lambda.)
Why migrate the Slack Stock Bot to Lambda functions? Mainly for illustrative purposes for this series of articles. In reality, there might be some relatively time-consuming business logic that you might want to take out of the main code path of an application and run asynchronously with a Lambda function. In the domain of equities and quotes, you might want to have a separate serverless function that will compute some Greeks and either store those values in a database, or enrich our Slack notification messages with those Greek values (like the delta and gamma).
In the migration path that we are going to undertake, we will just start off with a simple Go-based “Hello World” lambda, and then slowly drag in the parts of the Slack Stock Bot that we need in order to implement the alert mechanism.
| The source code to this project can be found here https://github.com/magmasystems/SlackStockSlashCommand https://github.com/magmasystems/SlackStockSlashCommand-Lambda |
Overview of the Migration
- Create a new Lambda Function using the AWS Lambda dashboard
- Create a new CloudWatch trigger that will cause the new Lambda Function to run
- Create a very simple Go-based Lambda using the Go/AWS SDK, and test it out
- Change the existing Slack Stock Bot code so that we can import packages from it easily
- Change the code to the new Lambda Function so that it replaces the ticker-based price break checking
- Deploy the new Lambda function
- Test the function by manually firing the CloudWatch event
Creating a New Lambda Function on AWS
The first step in the process is to create a new Lambda Function by using the AWS Lambda dashboard.
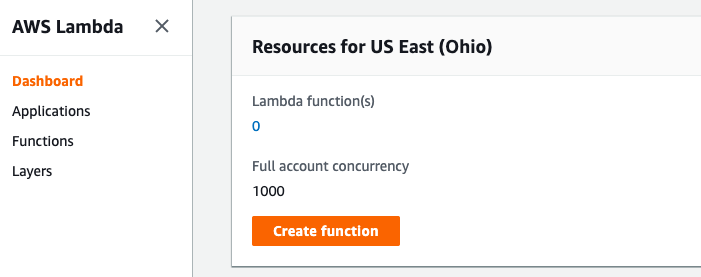
After clicking on the Create Function button, you will be presented with a form that you need to fill out with the information about your new function.
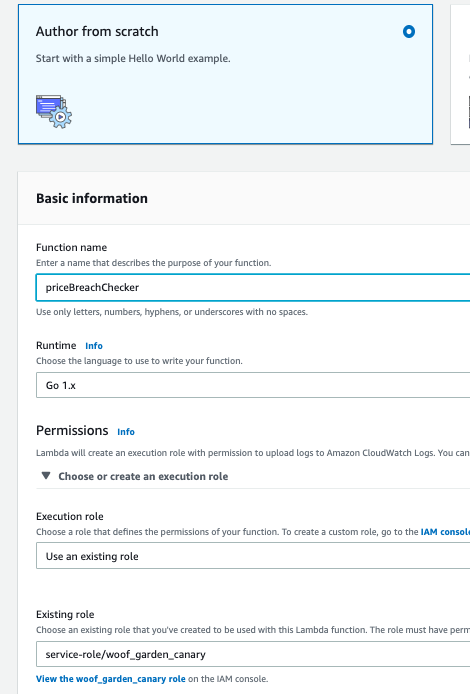
We call our new function priceBreachChecker. We make sure that the function has the Golang runtime installed, and we will use a previous execution role that we have set up. The execution role determines which AWS services the lambda function can access.
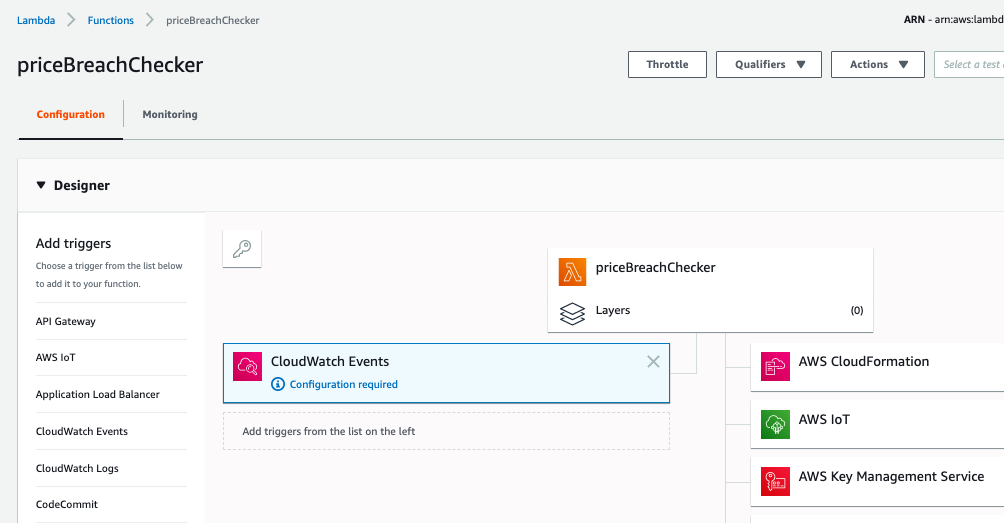
After creating the lambda function, we need to specify what kind of events will trigger the execution of the function.
Creating the CloudWatch Trigger
If you recall, the current Slack Stock Bot code creates an application-based ticker that will check for price breaches at certain intervals. This uses the Golang ticker package. At every tick, the code will call the quote service to retrieve all the current prices for the stock symbols that have alerts on them. It will then call some SQL that will ask the Postgres database to see which current prices have breached the price limits that were set up.
In order to simulate this ticker, we will use AWS CloudWatch events. You can set up CloudWatch to call a Lambda Function at regular intervals or on a cron-based schedule (ie: every weekday at 12:00 PM and at 5:00 PM).
Back in the Lambda dashboard, add a new trigger. Choose CloudWatch Events from the list of triggers on the left side of the page.
Now we need to set up the interval that the CloudWatch trigger will fire.
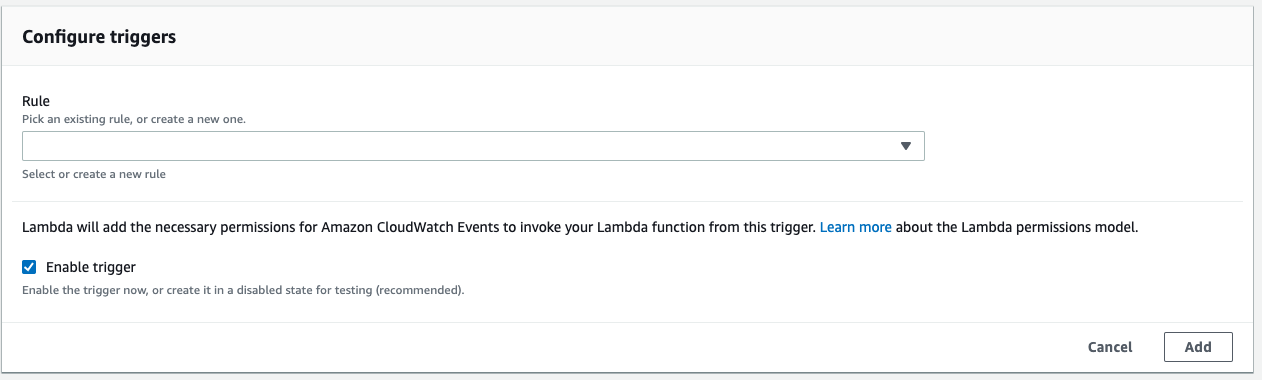
Click on the Add button. For the Rule Type, choose Schedule Expression, and use rate(60 minutes) as the expression. This will tell CloudWatch to fire the event every hour.

Click on the Add button. You will get confirmation that the new Lambda Function has been created.

Before we look at the CloudWatch dashboard, notice that there is a way that you can upload a ZIP file of your Go-based Lambda code. We will not be using this. Instead, we will be using the AWS CLI from within Visual Studio Code to deploy our code.

Changing the CloudWatch Trigger
Let’s look at the CloudWatch dashboard in order to verify that we have a trigger. On the left side of the page, find the Events / Rules menu item and click on it.

If you click on the name of the rule, you can see some further details.
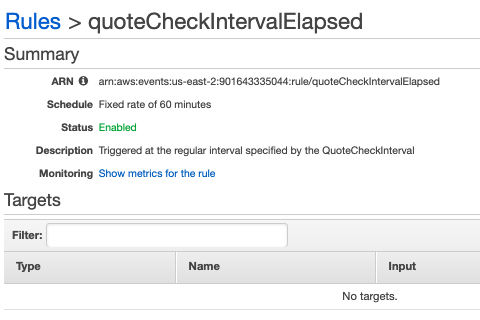
Under the Actions button, choose Edit. You will see that there is a rule that controls the interval that the event will be fired. If you want to change the interval at which the Price Breach Checker will run, then adjust this interval.

You can also have this rule trigger additional Lambda functions. Let’s say that we have a separate price-fetching Lambda function for every different quote service we support. We can have this CloudWatch rule trigger each of the separate Lambda functions. If you want to do this, choose a new Lambda function, and click on the Add Target button.

Creating a Simple Go-based Lambda
The main docs on Lambda and Go can be found here:
https://docs.aws.amazon.com/lambda/latest/dg/go-programming-model.html
We need to download and install the AWS Lambda SDK for Go
go get github.com/aws/aws-lambda-go/lambda
Now let’s get busy with Visual Studio Code. We are going to create a new folder for our new Lambda function.
Creating Tasks for Visual Studio Code
We can create a list of tasks that Visual Studio Code will run to do the build and deploy of the Lambda function. In Visual Studio Code, go to Terminal / Configure Tasks, and edit the tasks.json file.
My tasks.json file looks like this:
{
   // https://code.visualstudio.com/docs/editor/tasks-appendix
   "version": "2.0.0",
   "tasks": [
       {
           "label": "Build",
           "type": "shell",
           "command": "go",
           "args": [ "build", "-o", "priceBreachChecker"],
           "options": {
               "env": {
                   "GOOS": "linux",
                   "GOARCH": "amd64"
               }
           },
           "group": {
               "kind": "build",
               "isDefault": true
           }
       },
       {
           "label": "Zip",
           "command": "zip",
           "args": [ "priceBreachChecker.zip", "priceBreachChecker", "appSettings.json"],
           "dependsOn":[ "Build" ]
       },
       {
           "label": "CreateAndDeploy",
           "command": "aws",
           "type": "shell",
           "args": [
               "lambda", "create-function",
               "--function-name", "priceBreachChecker",
               "--region",  "us-east-2",
               "--profile", "default",
               "--role", "arn:aws:iam::901643335044:role/service-role/woof_garden_canary",
               "--handler", "priceBreachChecker",
               "--runtime", "go1.x",
               "--zip-file", "fileb://./priceBreachChecker.zip"
           ],
           "options": {
           },
           "problemMatcher": [],
           "dependsOn":[ "Zip" ]
       },
       {
           "label": "UpdateAndDeploy",
           "command": "aws",
           "type": "shell",
           "args": [
               "lambda", "update-function-code",
               "--function-name", "priceBreachChecker",
               "--region",  "us-east-2",
               "--profile", "default",
               "--zip-file", "fileb://./priceBreachChecker.zip"
           ],
           "options": {
           },
           "problemMatcher": [],
           "dependsOn":[ "Zip" ]
       }
   ]
}
There are four tasks here.
One is the Build task, which compiles the Go code. Notice that we use two special environment variables that tell the Golang compiler about the platform that the code should be generated for.
“GOOS”: “linux”,
“GOARCH”: “amd64”
The AWS server that runs your Lambda function is a runs Amazon’s own version of Linux and runs Go code that is compiled to the amd64 chipset.
The next task will Zip up the compiled executable and the appSettings.json configuration file. AWS requires that a ZIP file contains the assets for your Lambda function. Notice that the Zip task has a dependency on the Build task, so if you run the Zip task, it will automatically do the build as well.
(Note: Instead of using a separate application settings file, you can set environment variables in the Lambda function dashboard, and then read those environment variables.)
The CreateAndDeploy task will not be used here, because we already created the Lambda function using the AWS Lambda dashboard.
The final task is UpdateAndDeploy. This is used to update AWS with new versions of the code. It will upload the ZIP file that was created by the Zip task. We made the UpdateAndDeploy task dependent on the Zip task so that the build. zip and upload processes can be done with a single command.
Writing a Sample Lambda Function in Go
We will create a simple Go package which will just echo the arguments to the log.
Here is the code:
priceBreachChecker.go
package main

import (
    "context"
    "fmt"
    "log"

    ev "github.com/aws/aws-lambda-go/events"
    "github.com/aws/aws-lambda-go/lambda"
    "github.com/aws/aws-lambda-go/lambdacontext"
)

func main() {
    lambda.Start(priceBreachChecker)
}

func priceBreachChecker(ctx context.Context, event ev.CloudWatchEvent) (int, error) {
    lambdaContext, _ := lambdacontext.FromContext(ctx)
    log.Println(fmt.Sprintf("In priceBreachChecker handler: context is %+v", lambdaContext))
    log.Println(fmt.Sprintf("In priceBreachChecker handler: event is %+v", event))
    return 0, nil
}
Notice the arguments for the priceBreachChecker function. There are several different function signatures for the entry point, and somehow, the AWS Lambda runtime is able to figure out how to marshal the various triggers to the functions. The CloudWatchEvent is the struct that contains all of the information that the CloudWatch trigger generates.
Testing the Lambda
The first step to testing out this simple Lambda function is to build it, zip it up, and deploy it to AWS. To do this, I ran the Zip and the UpdateAndDeploy tasks from within Visual Studio Code.
I went into the CloudWatch Event Rules and temporarily changed the trigger interval to 30 seconds.
Then I went into the CloudWatch logs and waited until the trigger fired. Here is what the log looked like:

Success!!! The two log messages that the function generated can be seen in the CloudWatch log.
(Don’t forget to change the trigger back to 60 minutes, or else your Lambda function will run every 30 seconds)
Packaging the Slack Stock Bot
Most programming environments support the use of packages. In the world of C#, we use NuGet to import third-party packages. In the Node.js world, people use npm, and Java, most developers use Maven.
When we write our new price-checking Lambda function, we would like to import the code from our existing Slack Stock Bot. We have seen that you can import packages from Github using the go get command.
Since our existing code is already up on Github, let’s import it:
go get github.com/magmasystems/SlackStockSlashCommand
Easy enough, right? But look at the various error messages that Go Get gives us. These error messages all look like this:
../../go/src/github.com/magmasystems/SlackStockSlashCommand/stockbot/stockbot.go:11:2:
       local import "../configuration" in non-local package
What does this mean?
In the file stockbot.go, we have a bunch of imports that look like this:
import config "../configuration"
It seems that Go Get does not like any relative references in the code that it imports. By “relative reference”, we mean an import whose directory is relative to any other directory. These references usually start with the dot character, like “../” or “./”.
So what do we need to do? We need to find all relative references in the import statements in our code, and turn them into references into our Github repository.
import "github.com/magmasystems/SlackStockSlashCommand/configuration"
You can read more about this issue here.
Now that we have fixed all of these references, and we have checked the code back into Github, we can now run the command
go get github.com/magmasystems/SlackStockSlashCommand
Merging the Slash Command Code in with the Lambda
We will import the parts of the Slack Stock Bot package that we need.
When the Lambda function is loaded, the init() function is called. This is a feature of Go. The init function is the place where you can do one-time initialization.
In the init() function, we read the configuration information (we will need the webhook part of the appSettings), we create the Stockbot (which is the interface to the quote services), and we will create the AlertsManager (which does the checking for the price breaches).
When the Lambda function is triggered, we call the function to check for the price breaches, and for every breach, we notify the user through Slack.
We insert a number of logging statements, just so we can trace the running of the code.
package main

import (
    "context"
    "fmt"
    "log"
    "time"

    ev "github.com/aws/aws-lambda-go/events"
    "github.com/aws/aws-lambda-go/lambda"
    "github.com/aws/aws-lambda-go/lambdacontext"

    "github.com/magmasystems/SlackStockSlashCommand/alerts"
    config "github.com/magmasystems/SlackStockSlashCommand/configuration"
    "github.com/magmasystems/SlackStockSlashCommand/slackmessaging"
    "github.com/magmasystems/SlackStockSlashCommand/stockbot"
)


var theBot *stockbot.Stockbot
var theAlertManager *alerts.AlertManager
var appSettings *config.AppSettings

func init() {
    // Put any one-time initialization code here
    configMgr := new(config.ConfigManager)
    appSettings = configMgr.Config()

    theBot = stockbot.CreateStockbot()
    // defer theBot.Close()

    // Create the AlertManager
    theAlertManager = alerts.CreateAlertManager(theBot)
    // defer theAlertManager.Dispose()
}

func main() {
    lambda.Start(priceBreachChecker)
}

func priceBreachChecker(ctx context.Context, event ev.CloudWatchEvent) (int, error) {
    lambdaContext, _ := lambdacontext.FromContext(ctx)
    log.Printf("In priceBreachChecker handler: context is %+v\n", lambdaContext)
    log.Printf("In priceBreachChecker handler: event is %+v\n", event)

    checkForPriceBreaches()

    return 0, nil
}

// checkForPriceBreaches - checks for price breaches
func checkForPriceBreaches() {
    fmt.Println("checkForPriceBreaches: Checking for price breaches at " + time.Now().String())

    theAlertManager.CheckForPriceBreaches(theBot, func(notification alerts.PriceBreachNotification) {
        log.Println("The notification to Slack is:")
        log.Println(notification)
        outputText := fmt.Sprintf("%s has gone %s the target price of %3.2f. The current price is %3.2f.\n",
            notification.Symbol, notification.Direction, notification.TargetPrice, notification.CurrentPrice)

        slackmessaging.PostSlackNotification(
                               notification.SlackUserName, notification.Channel, outputText, appSettings)
    })

    fmt.Printf("checkForPriceBreaches: Finished checking for price breaches at %s\n", time.Now().String())
}
That’s all we need to do for the new Lambda function. We are ready to deploy and test the code.
Deploying the New Lambda Function
Run the UpdateAndDeploy task from Visual Studio Code. You will see this output:
{
    "FunctionName": "priceBreachChecker",
    "LastModified": "2019-06-20T13:14:25.885+0000",
    "RevisionId": "7278be22-93ab-4bee-8c85-b4fea3a9857e",
    "MemorySize": 512,
    "Version": "$LATEST",
    "Role": "arn:aws:iam::XXXXXXXXXXX:role/service-role/woof_garden_canary",
    "Timeout": 15,
    "Runtime": "go1.x",
    "TracingConfig": {
        "Mode": "PassThrough"
    },
    "CodeSha256": "GVzIhBYObNJY4+ENZ78Emr081ApWxJPOS3KAD/AMbA4=",
    "Description": "",
    "VpcConfig": {
        "SubnetIds": [],
        "VpcId": "",
        "SecurityGroupIds": []
    },
    "CodeSize": 4848883,
    "FunctionArn": "arn:aws:lambda:us-east-2:XXXXXXXXXX:function:priceBreachChecker",
    "Handler": "priceBreachChecker"
}
This confirms that the new version of the code has been uploaded.
Testing the Lambda Function
In the Lambda Console, create a new test event.

Since our priceBreachChecker lambda function reacts to a CloudWatch trigger, we choose an Event Template that mimics a CloudWatch event.

After you click on the Create button to create the event, go back into the Lambda console and click on the Save button.
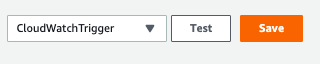
Now that the test event has been created and saved, click on the Test button in order to manually fire a CloudWatch event. You should see a Slack notification generated in the log.

Success!!! We successfully created a Lambda function that does the alerting on price breaches. And the notifications show up in Slack too.
All of the source code to this article can be found here:
https://github.com/magmasystems/SlackStockSlashCommand-Lambda
As always comments are welcome.
Possible Enhancements
Currently, the Lambda function runs and just notifies the Slack user when a price breach occurs. We can enhance the code to compute other values, and output those values to other AWS services. In the last article, we talked about the computation of Greeks. We can send those Greek values to an SNS topic, we can store them in DynamoDb, or we can feed them into a Kinesis stream. We can do this by calling other parts of the AWS-Go SDK from within the Lambda function.
Once you have a Lambda function running inside of AWS, the possibilities are many.
About Me

Marc Adler is the founder of CTO as a Service, a consultancy that provides senior-level technical services to companies who are in need of a CTO or Chief Architect on a “pay for what you use” basis. He was formerly the Chief Architect of companies like Citigroup, MetLife, ADP, and Quantifi. He likes to get himself in trouble with his CIOs by insisting on coding.